ALREADY DONE FOR YOU
Your pipeline and its stages, every automation, your service calendars, your invoice tracking and your payment tools were built and switched on when your account was created. If a step below already shows the right information, that isn’t a mistake — it means we did it during your onboarding. Check it and move on.
STEP 1
ABOUT 5 MINUTES
Sign in and look around
GO TO
your sign-in link · in your welcome email
Open your sign-in page in any browser — the address and your credentials are in your welcome email. Bookmark it. From now on this is your business’s home base.
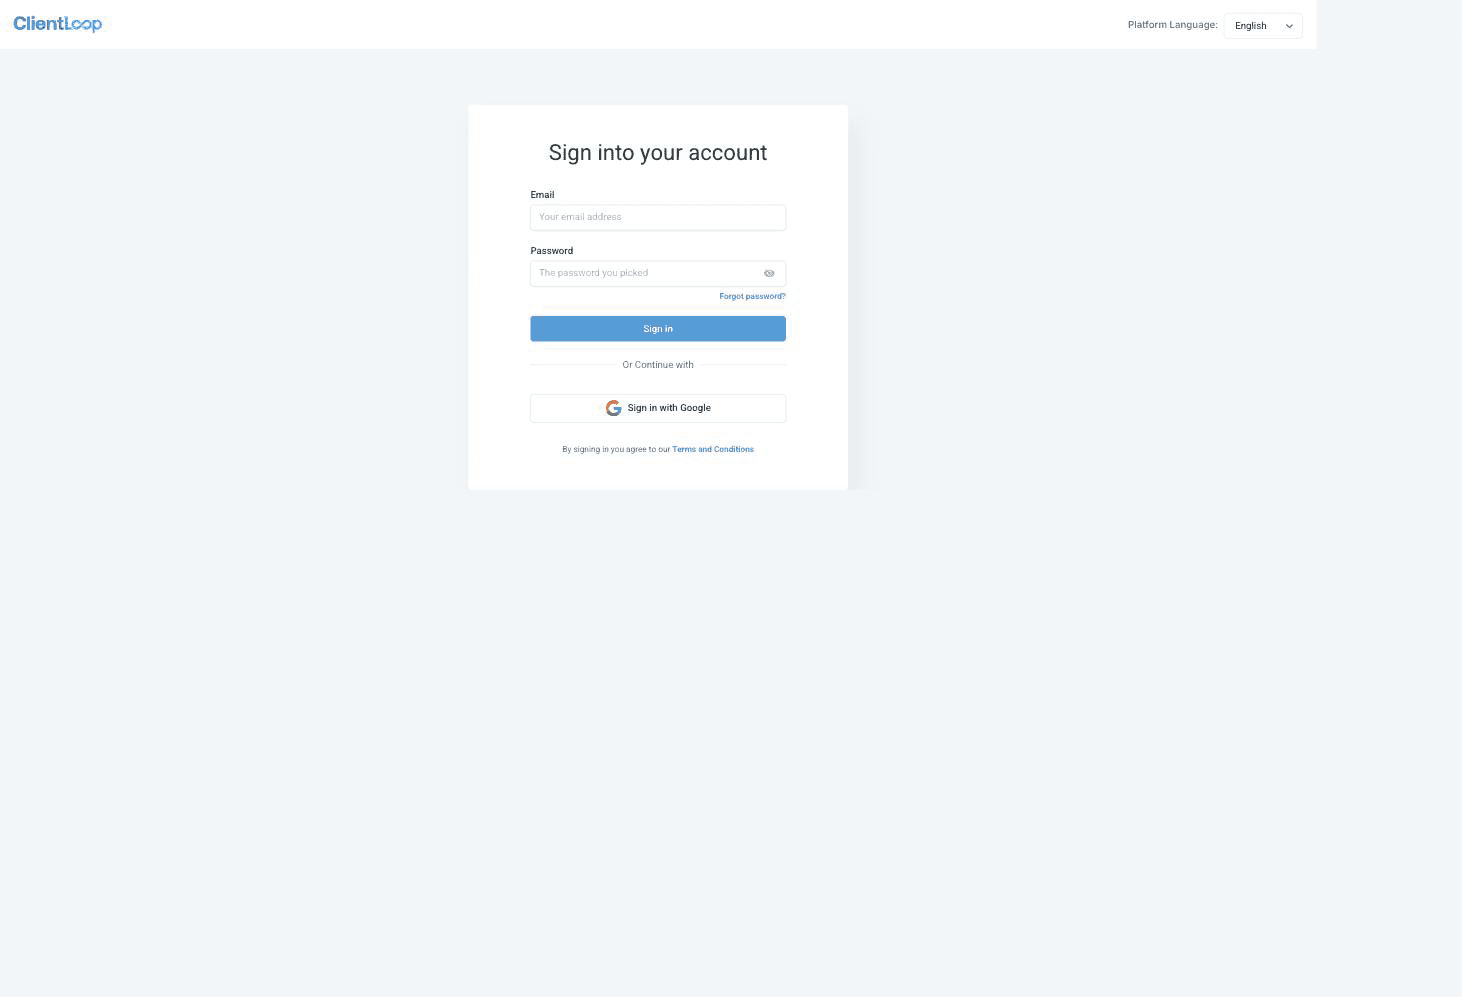
Your sign-in screen, on your own web address.
The first thing you’ll see is your Dashboard — your numbers at a glance, with the CRM guide right there whenever you want a refresher.
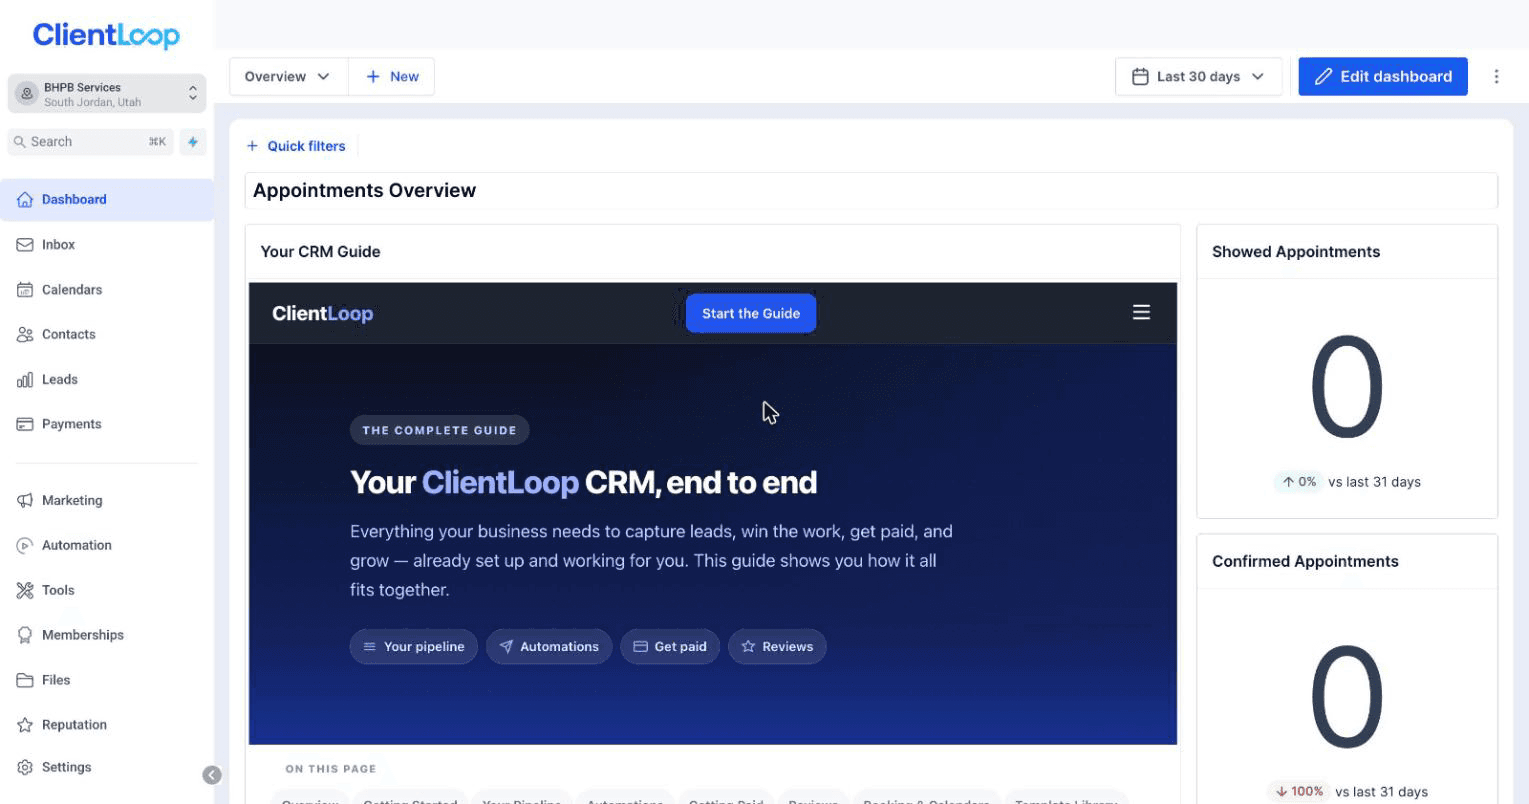
The dashboard: your numbers, and the built-in guide.
What’s down the left side
Dashboard — your numbers at a glance
Inbox — every text, email and chat, in one thread per customer
Calendars — your schedule and your bookings
Contacts — every customer and lead, with their full history
Leads — your pipeline board, where every job moves left to right
Payments — invoices, estimates, and everything money
You’ll know it worked when
you can sign in, see your dashboard, and your business name is in the top-left corner.
STEP 2
ABOUT 2 MINUTES
Check your business details
GO TO
Settings → Business Profile
This is the identity your CRM uses everywhere — on your invoices, in your messages, in your booking confirmations. It was filled in during onboarding, so this is a read-through, not a form to complete.

Business Profile: name, logo, address, phone and time zone.
Four things to check
Business name and logo — exactly what you want customers to see
Address — as registered for your business
Business phone and email — where you actually want to be reached
Time zone — your reminders and booking slots run on it
You’ll know it worked when
every line on this page reads the way you’d want a customer to see it.
STEP 3
ABOUT 2 MINUTES
Confirm your wording
GO TO
Settings → Custom Values
Your CRM talks to your customers in your words. A detailer’s customers hear “your detail.” An HVAC company’s hear “your service call.” This was set with you during onboarding — here is what it controls.
What you call your service — “your detail” · “your service”
What you call your team — “your technician” · “your specialist”
The next step you offer — “schedule your service”
What you call a quote — “your estimate” · “your quote”
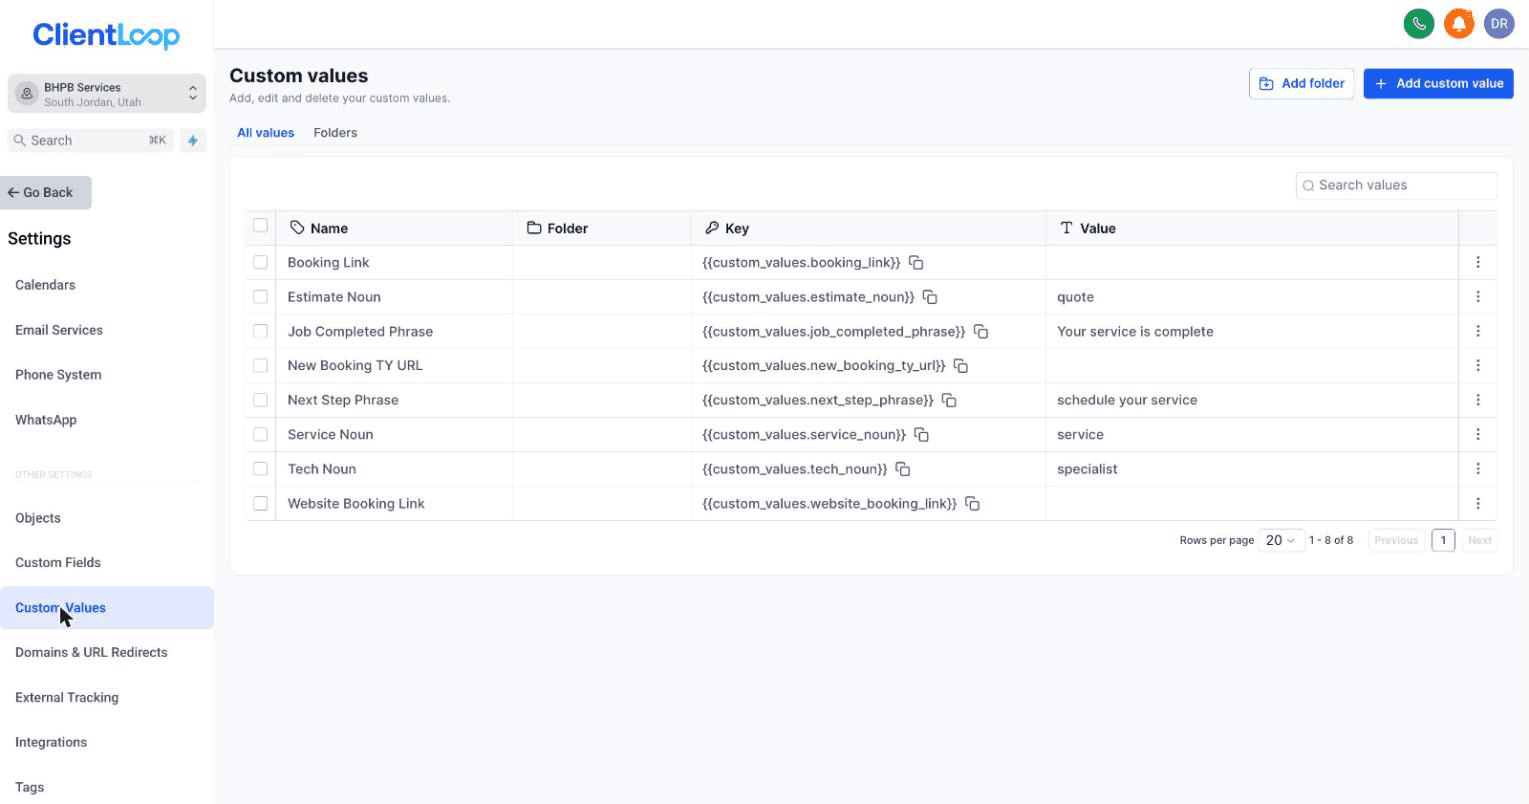
The wording settings behind every automated message.
If any of these don’t sound like your business, tell your onboarding contact and we’ll change them — every automated text and email uses them.
You’ll know it worked when
you read the values out loud and they sound like something you’d actually say.
STEP 4
ABOUT 10 MINUTES
Set up your booking calendars
GO TO
Calendars → Calendar settings
Your account ships with a consultation calendar plus a ready-built calendar for each common service in your industry. These are templates we’ve already built for you — here’s a detailing business’s set, as an example.
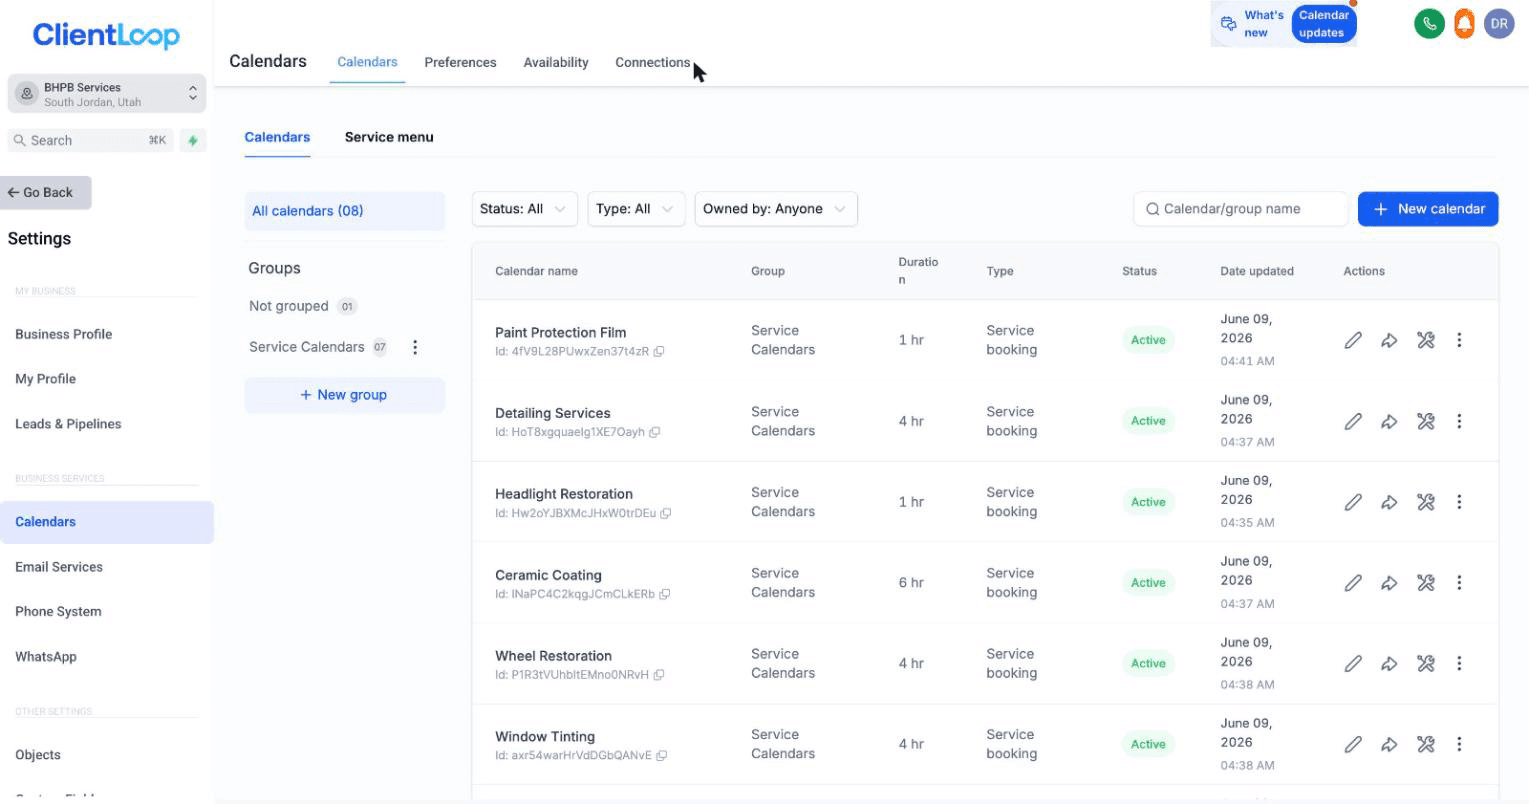
One calendar per service, plus consultation.
Three things to do here
Make the list yours — these are templates, and they’re yours to shape. Keep the ones that match what you do, delete the ones you don’t offer, and add your own for anything missing
Assign who covers each service — each calendar has its own team members, hours and appointment length
Connect your personal calendar — optional, but recommended — link Google or Outlook in the Connections tab so personal events block booking slots automatically

The Connections tab, where your own calendar links in.
You’ll know it worked when
the calendar list matches your service menu — however you got there — and a test booking lands on the right person.
STEP 5
ABOUT 5 MINUTES
Connect your Google reviews
GO TO
Reputation → Get Started
After every completed job your CRM asks the happy customer for a review, by text and by email. One connection points all of it at the right place: your Google Business Profile.
Click Connect Google Business Profile, sign in, and pick your listing. Then confirm your review link under Reputation → Settings → Review Link, and send yourself a test.
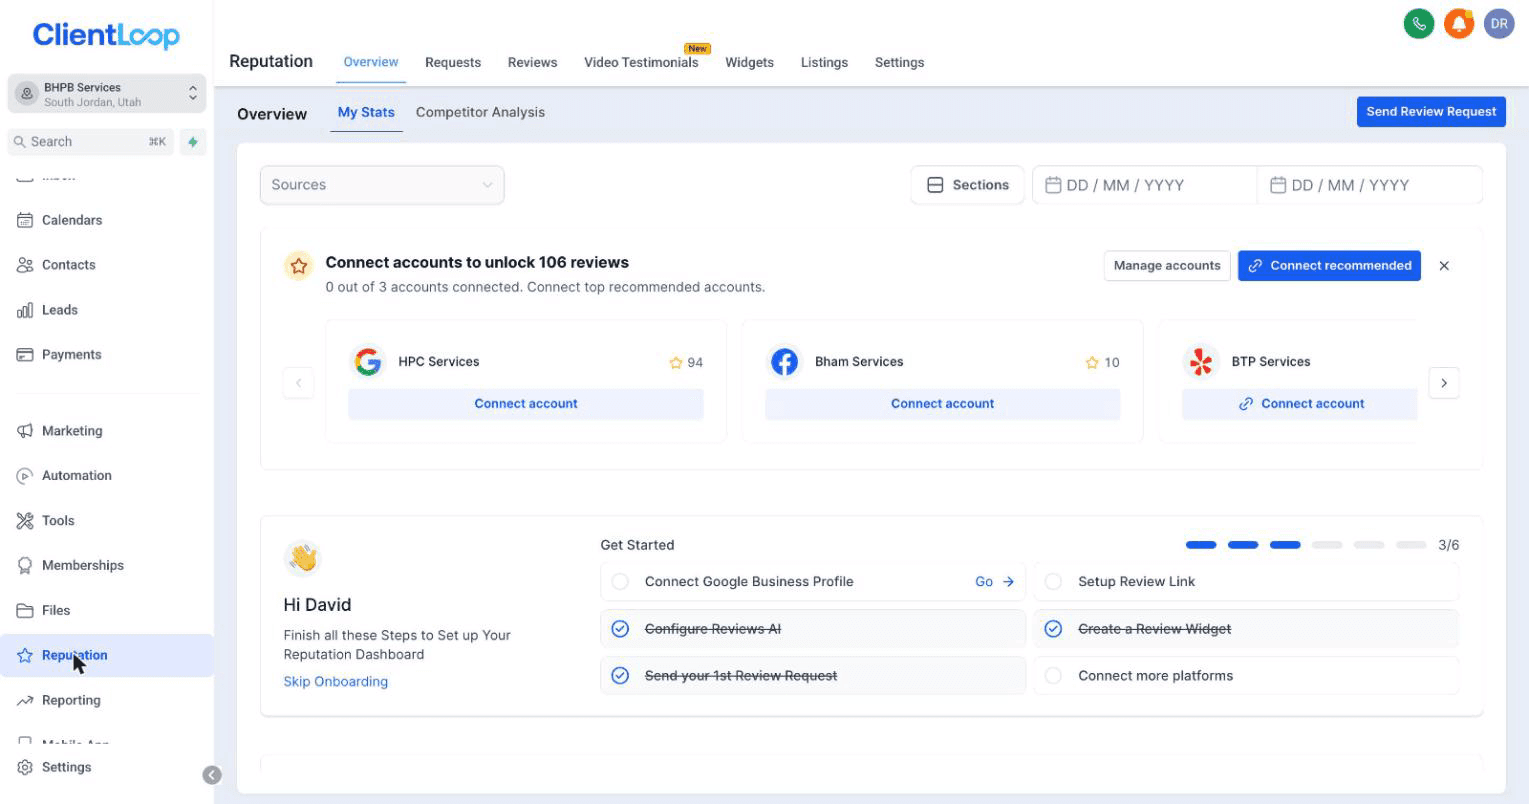
The Reputation checklist, with the Google connection at the top.
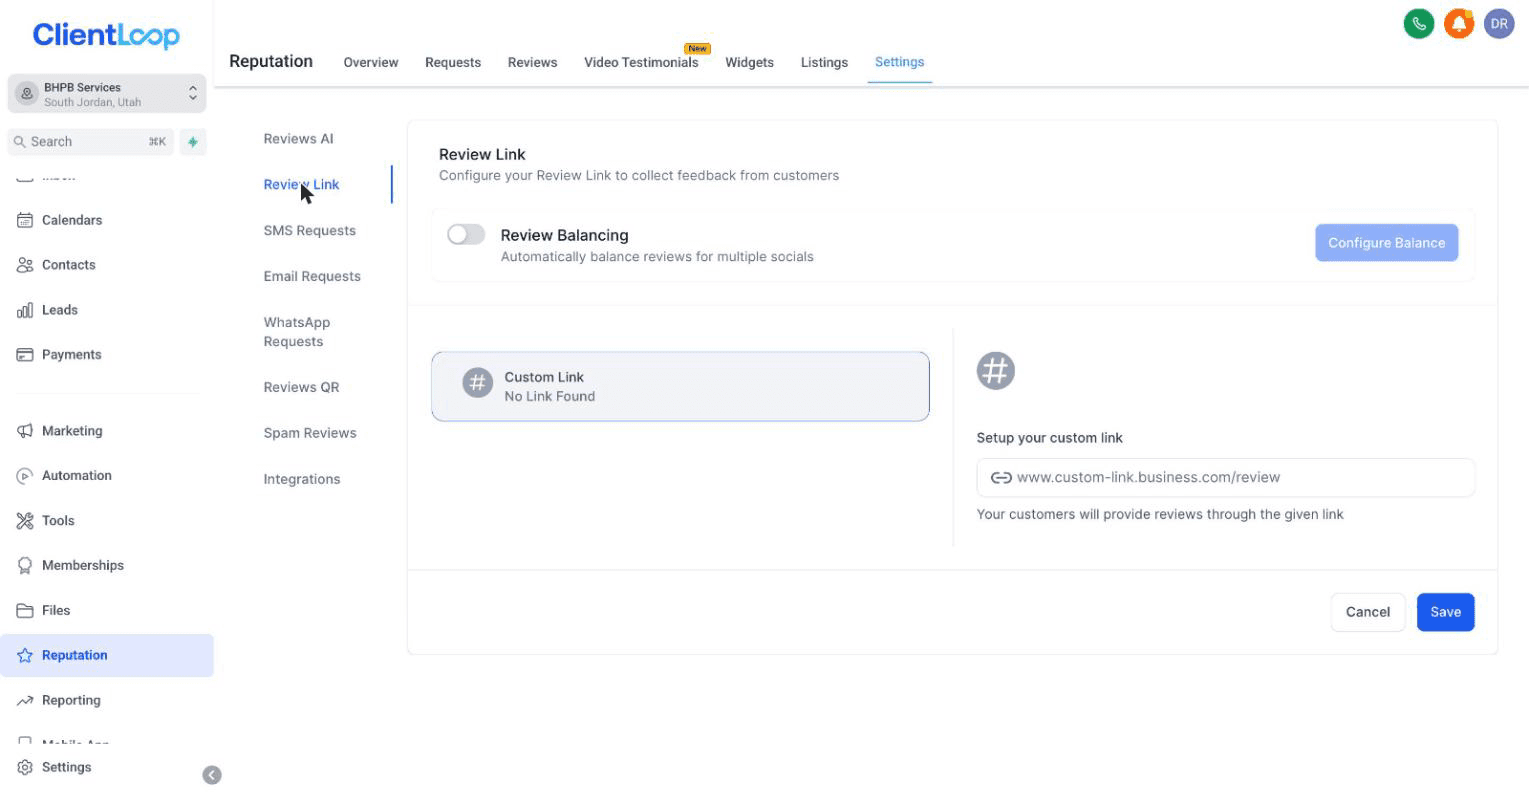
The review link that every request points at.
WHY THIS ONE MATTERS MOST
Reviews compound. They win you the next lead, and a stronger review base widens what you can offer customers — including financing. Of everything in this guide, this is the highest-leverage five minutes.
You’ll know it worked when
your test request arrives, and the link opens your own Google review box.
STEP 6
ABOUT 2 MINUTES
Confirm payments
GO TO
Payments → Invoices
Payments are built into your CRM from day one — card, bank transfer, and Flex Pay customer financing, plus text-to-pay links and automatic reminders. There’s nothing to install and nothing to switch on.
All you’re doing at this step is confirming you can see it. Open the invoices page and you should get the tracking view: what’s in draft, what’s due, what you’ve received, what’s overdue. Yours starts empty — that’s correct.
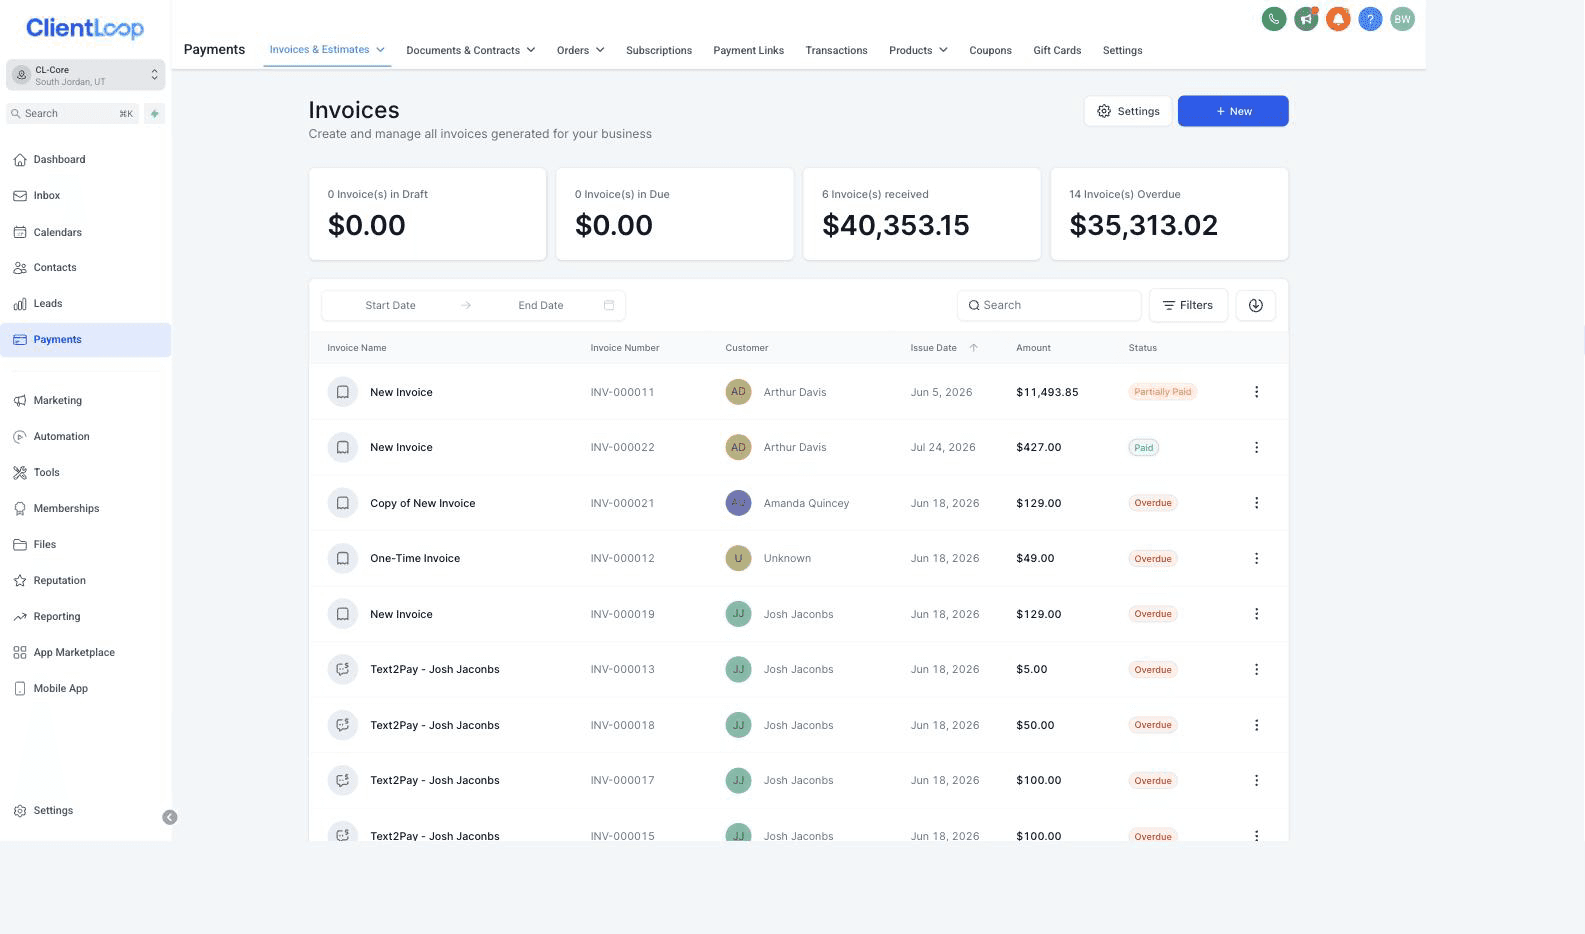
The tracking view. Yours starts empty.
You’ll know it worked when
the page opens and shows you those four totals.
When you’re ready to send your first invoice, that’s a guide of its own: Getting paid →
STEP 7
ONE-TIME REGISTRATION
Turn on texting (optional)
GO TO
Settings → Phone System → Trust Center
Text messages get seen faster than anything else you send. Before any business can text customers in the U.S., mobile carriers require a one-time registration called A2P. Every business goes through it, and it only happens once.
Three things need to be true before you start
Email sending is live — already running on every account — see it under Settings → Email Services
You have a texting number — under Settings → Phone System. If that list is empty, tell your onboarding contact first
Your privacy policy and terms mention texting — both web addresses are required fields, and the reviewer opens and reads them. This is the one that catches most people out
You’ll know it worked when
the Trust Center shows your Brand and Campaign as submitted — and later, approved.
Everything the registration asks for is written out for you: Turning on texting →
YOU CAN GO LIVE WITHOUT IT
Texting is the one channel carriers gate behind registration. Everything else — email automations, booking, payments, reviews — works from day one. Start now and register when it suits you.
STEP 8
YOU’RE DONE
Go live
GO TO
Leads · your pipeline board
Point your website forms and your ads at your CRM, and you’re in business. Every lead now lands on your board, gets an instant reply in your words, threads into one conversation per customer, and builds a record as it goes.
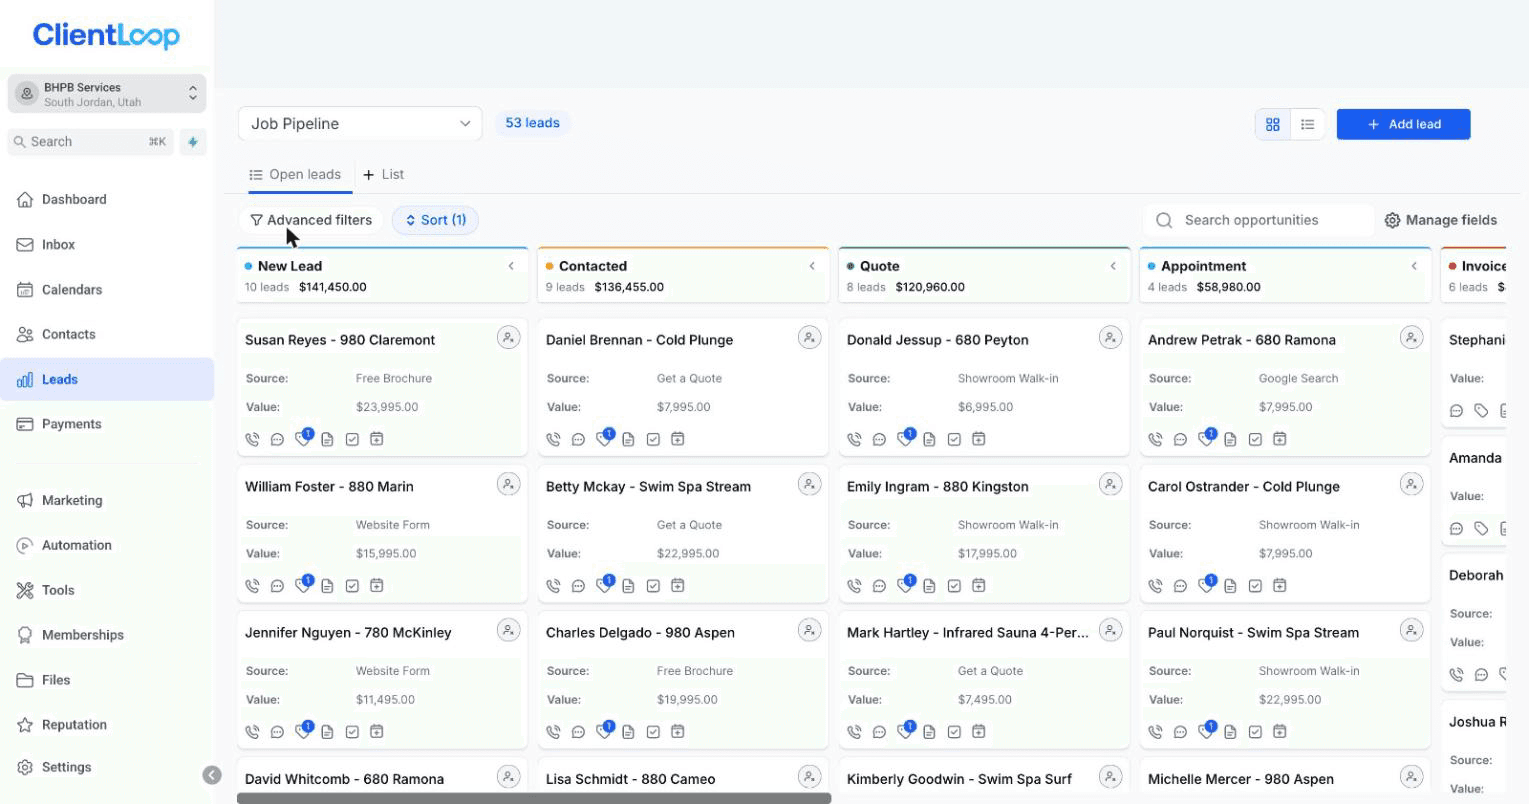
The pipeline board, first contact through to paid.
The go-live test — do this once
Submit your own website form — use your real cell number
Watch the card appear — it lands at the start of your pipeline
Check both sides — you get the instant reply as the customer, and the new-lead task as the owner
Drag the card forward one stage — you’ve just run your whole system end to end
You’ll know it worked when
that test fires on every step. You’re live.
From here, your owner’s manual is Your CRM, end to end →
Common questions
How much of this do I have to do myself?
Only what’s above — and half of that is checking work already done. The identity pieces (your Google account, your calendar, your EIN for texting) can only come from you. Everything else arrived built.
What if I skip the texting registration?
Everything else still works — email automations, booking, payments, reviews. You can start without it and register later.
Can I change my services or wording later?
Yes. Calendars, wording and team assignments are all adjustable. Change calendars yourself under Calendar settings, or tell your onboarding contact for the rest.
What happens when I get my first real lead?
It lands at the start of your board, gets an instant reply in your voice, and raises a “call and qualify” task for your team — usually before you’ve seen the notification.